
Quick answer: To throw a baseball correctly, grip the ball across the seams with your first two fingers and thumb, turn your side to the target, step toward it, bring your arm back and up in one smooth motion, and finish with your chest facing the target. Power comes from the legs and body, not just the arm.
Key takeaways
- Throwing is a full-body motion. The legs and hips start it, and the arm finishes it.
- Grip the ball with two fingers and a thumb across the seams, and keep it in the fingers, not the palm.
- Point your front shoulder and your step at the target, then finish with your chest facing it.
- Teach a kid in small pieces: grip, stance, step, arm, finish. Slow reps beat hard throws.
- Warm up before throwing, and see a doctor or athletic trainer if a young arm hurts.
How do you throw a baseball correctly?
You throw a baseball correctly by using your whole body in one smooth chain. Hold the ball across the seams, turn your side to the target, step toward it, bring the ball back and up, and let your arm come through as your hips and chest rotate to face the target. The arm is the last link, not the engine.
Most young players try to throw with the arm alone. That costs them accuracy and puts extra stress on the shoulder and elbow. Coach Murphy Su’a has spent more than 40 years coaching at the high school, college, professional and international levels, and he starts every new thrower with the same idea: build the throw from the ground up.
This guide covers the grip, the steps of the motion, how to teach a kid to throw, the mistakes we see most often, and basic arm care. If you want to see these skills in person, our free youth baseball clinics will cover throwing mechanics for players of all ages.
Free for parents, coaches and players
Get the free drill pack
19 baseball and softball drills for hitting, fielding, throwing and pitching, plus a 60-minute practice plan. One printable PDF, sent to your inbox.
What is the right way to grip a baseball?
The standard grip is a four-seam grip. Place your index and middle fingers across the wide part of the seams, put your thumb underneath the ball on the opposite side, and let your ring and pinky fingers rest along the side.
Three details matter most:
- Hold the ball in your fingertips. A small gap between the ball and your palm lets it come off your fingers cleanly.
- Keep your fingers across the seams. The seams give you something to grip and help the ball fly straight.
- Hold the ball firmly but not tight. A death grip tightens the forearm and slows the arm down.
Smaller hands can struggle with a full-size ball. If a young player cannot get two fingers across the seams, use a smaller ball for practice and move up as the hand grows.
What are the steps of a proper throwing motion?
A throwing motion is the sequence of movements that moves the ball from the glove side to the release point. Here it is in order. Practice each step slowly before putting them together.
- Set your feet. Stand with your feet about shoulder width apart, ball in your throwing hand and glove out in front.
- Turn your side to the target. Rotate so your glove-side shoulder points at the target. Your back foot turns to run roughly parallel to the line you are throwing on.
- Separate your hands. Take the ball out of the glove and let both hands move apart. The throwing arm swings down and back while the glove arm stays up and pointed at the target.
- Step toward the target. Take a stride with your front foot directly at your target. Land on the ball of the foot, then let the heel settle.
- Bring the arm up. Lift the elbow to about shoulder height and bring the hand up behind the ball in an “L” shape, with the ball pointed away from the target.
- Rotate and throw. Turn the hips and chest toward the target and let the arm come forward. Release the ball out in front of your body.
- Finish. Let the arm continue across your body and bring your back foot around. Your chest should end up facing the target.
Slow, correct reps matter more than hard throws. A player who learns the order first will throw harder later without trying.
How do you teach a kid to throw a baseball?
To teach a kid to throw, break the motion into small pieces, use a soft ball at first, and keep every lesson short and positive. Young players learn through repetition and success, not through long explanations.
Here is the order we use in clinics:
- Grip first. Show the two-finger, thumb-underneath grip and have the child check it before every throw.
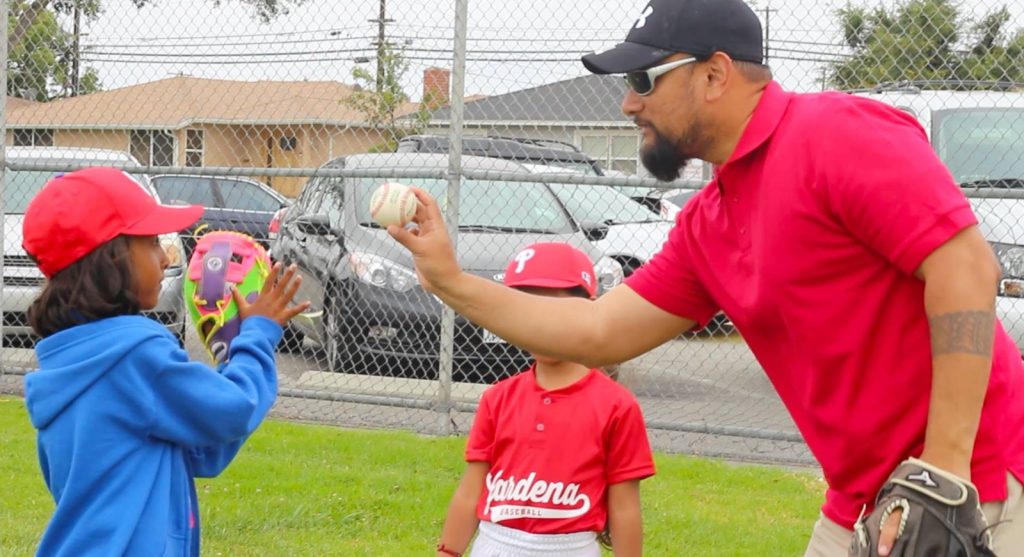
- Side to the target. Have the child stand sideways with the glove pointed at a partner. This alone fixes a lot of wild throws.
- Add the step. Ask the child to step toward the partner as they throw. Say the cue out loud: grip, side, step, throw.
- Play catch at a short distance. Start close, maybe 20 to 30 feet. Move back only when the throws are accurate and relaxed.
- Finish with the chest. Remind the child to let the back leg come through and finish facing the target.
Parents do not need to be coaches to help. Play catch for ten minutes, praise good steps and good grips, and keep the mood light. A child who enjoys catch will throw more, and more throws means more learning.
How far should a beginner throw?
Distance should grow slowly. If the ball starts bouncing or the child is leaning back and heaving it, they are too far away. Move closer and rebuild the habits.
What are the most common throwing mistakes?
The most common throwing mistakes are throwing with the arm only, pointing the front foot or shoulder away from the target, gripping the ball in the palm, and dropping the elbow below the shoulder. Each one has a simple fix.
- Arm only, no legs. Fix it by having the player step and finish with the chest. Practice throws from one knee, then standing, so they feel the difference.
- Closed or open front foot. If the foot lands off the line, the throw goes off the line. Draw a line in the dirt or lay down a string toward the target and step on it.
- Palm grip. The ball slows down and loses accuracy. Check for a gap between ball and palm before every throw.
- Low elbow. Keep the elbow near shoulder height as the arm comes up. A low elbow forces the arm to push the ball instead of throwing it.
- Stopping short. If the arm stops at release, the body has not followed through. Finish with the back foot coming around.
A parent can spot most of these from the side. Watch the feet first, then the elbow, then the finish.
How do you take care of a young throwing arm?
Arm care starts before the first throw. Warm up with light jogging and easy arm movements, begin with short easy throws, and build up to full-distance throws over several minutes. Rest the arm when it is tired.
A few simple habits help:
- Do not throw through pain. Soreness that lingers, or any sharp pain in the shoulder or elbow, means stop and see a doctor or athletic trainer.
- Take breaks. A young player who throws every day all year with no rest is asking for trouble.
- Follow pitch count guidelines for any young pitcher. MLB and USA Baseball’s Pitch Smart publishes age-based guidance on pitch counts and rest.
- Play more than one sport or take time off when you can. Variety helps a growing body.
We do not give medical advice. If a player has pain, a doctor or athletic trainer is the right next call.
What drills help improve throwing?
Simple drills work best for throwing. Each one below builds a specific part of the motion and takes only a few minutes.
- Knee throws. Kneel on the back knee, front foot forward, and throw to a partner. This isolates the arm and the turn of the upper body. Do 10 throws.
- Step-behind throws. Start with feet together, step back with the back foot to get your side turned, then step and throw. This teaches the footwork. Do 10 to 15 throws.
- Target throws. Pick a small target like a glove or a bucket and throw from short range. Focus on accuracy before distance. Do 15 throws.
- Long toss, easy. Back up one step at a time while throwing smoothly. Stop when the throws start to arc badly. Keep it relaxed.
For more practice ideas across hitting, fielding and throwing, read our guide to youth baseball drills. If your player is getting ready to compete for a spot on a team, our article on baseball tryouts explains how coaches evaluate throwing and fielding.
When should a player get one-on-one help?
Group clinics are great for learning the basics. A player who has the basics and wants to fix a specific habit, or who is playing in high school, college or pro baseball, may benefit from one-on-one work. Through player development, Coach Su’a works with high school, college and professional baseball and softball players one on one. He also coaches softball, and the same body-first ideas apply to throwing from the infield and outfield.
Frequently asked questions
What age can a child start throwing a baseball?
Children can start playing catch as soon as they can hold a ball and track it with their eyes. Use a soft ball at first and keep sessions short. Focus on fun, a good grip and stepping toward the target. Mechanics will improve with repetition.
Why does my child’s throw go sideways or short?
Usually the body is not turned or the legs are not involved. Check that the glove-side shoulder points at the target, the front foot steps toward it, and the player finishes facing the target. Fixing the feet often fixes the throw.
Should I use a two-finger or four-finger grip?
Most players use two fingers and a thumb across the seams. Very young players with small hands may need to start with a three-finger grip on a smaller ball. Move to two fingers as the hand grows and control improves.
How often should a young player throw?
Throw often enough to build skill, but rest when the arm is tired. Do not throw through pain. For pitchers, follow age-based pitch count and rest guidelines such as MLB and USA Baseball’s Pitch Smart, and ask a doctor or athletic trainer about any pain.
Is there a difference between throwing and pitching?
Yes. Throwing is the basic skill used by every position. Pitching adds a windup or stretch, a mound and a specific delivery. Players should learn to throw well first, because a sound throwing motion is the base for pitching.
Where can my child learn to throw in the South Bay?
DITR is planning its next season of free baseball and softball clinics for all ages in the Torrance and South Bay area. Players work on throwing, catching and other fundamentals with coaches. You can get updates on the clinic page on our website.
Sources and further reading: MLB Pitch Smart
Learn to throw with a real coach
When the next clinic season starts, bring your player to a free clinic and let them work on grip, footwork and finish with DITR coaches. Get free clinic updates.